BRIGADOON

Backyard Meteorological Instrumentation

Raspberry Pi 4Temperature Control

Overview

The Raspberry Pi 4 installed in the outside enclosure is mounted in a box on one of the internal DIN Rails. On extreme weather days, the air temperature in the area can reach nearly 50°C (122°F). Coupled with the afternoon direct sunlight, this has the potential to serious increase the temperature in the enclosure and hence the temperature of the air in which the Raspberry Pi 4 sits.

Although the Raspberry Pi is equipped with heat sinks on the significant heat-generating chips, this is not expected to be sufficient during heat waves. The Pi has one more trick up its sleeve in that it has an internal temperature sensor and will throttle back the CPU as it starts to overheat. While this will help protect the PI, it does mean that the software running on the Pi must be designed to cope with a throttled back CPU.

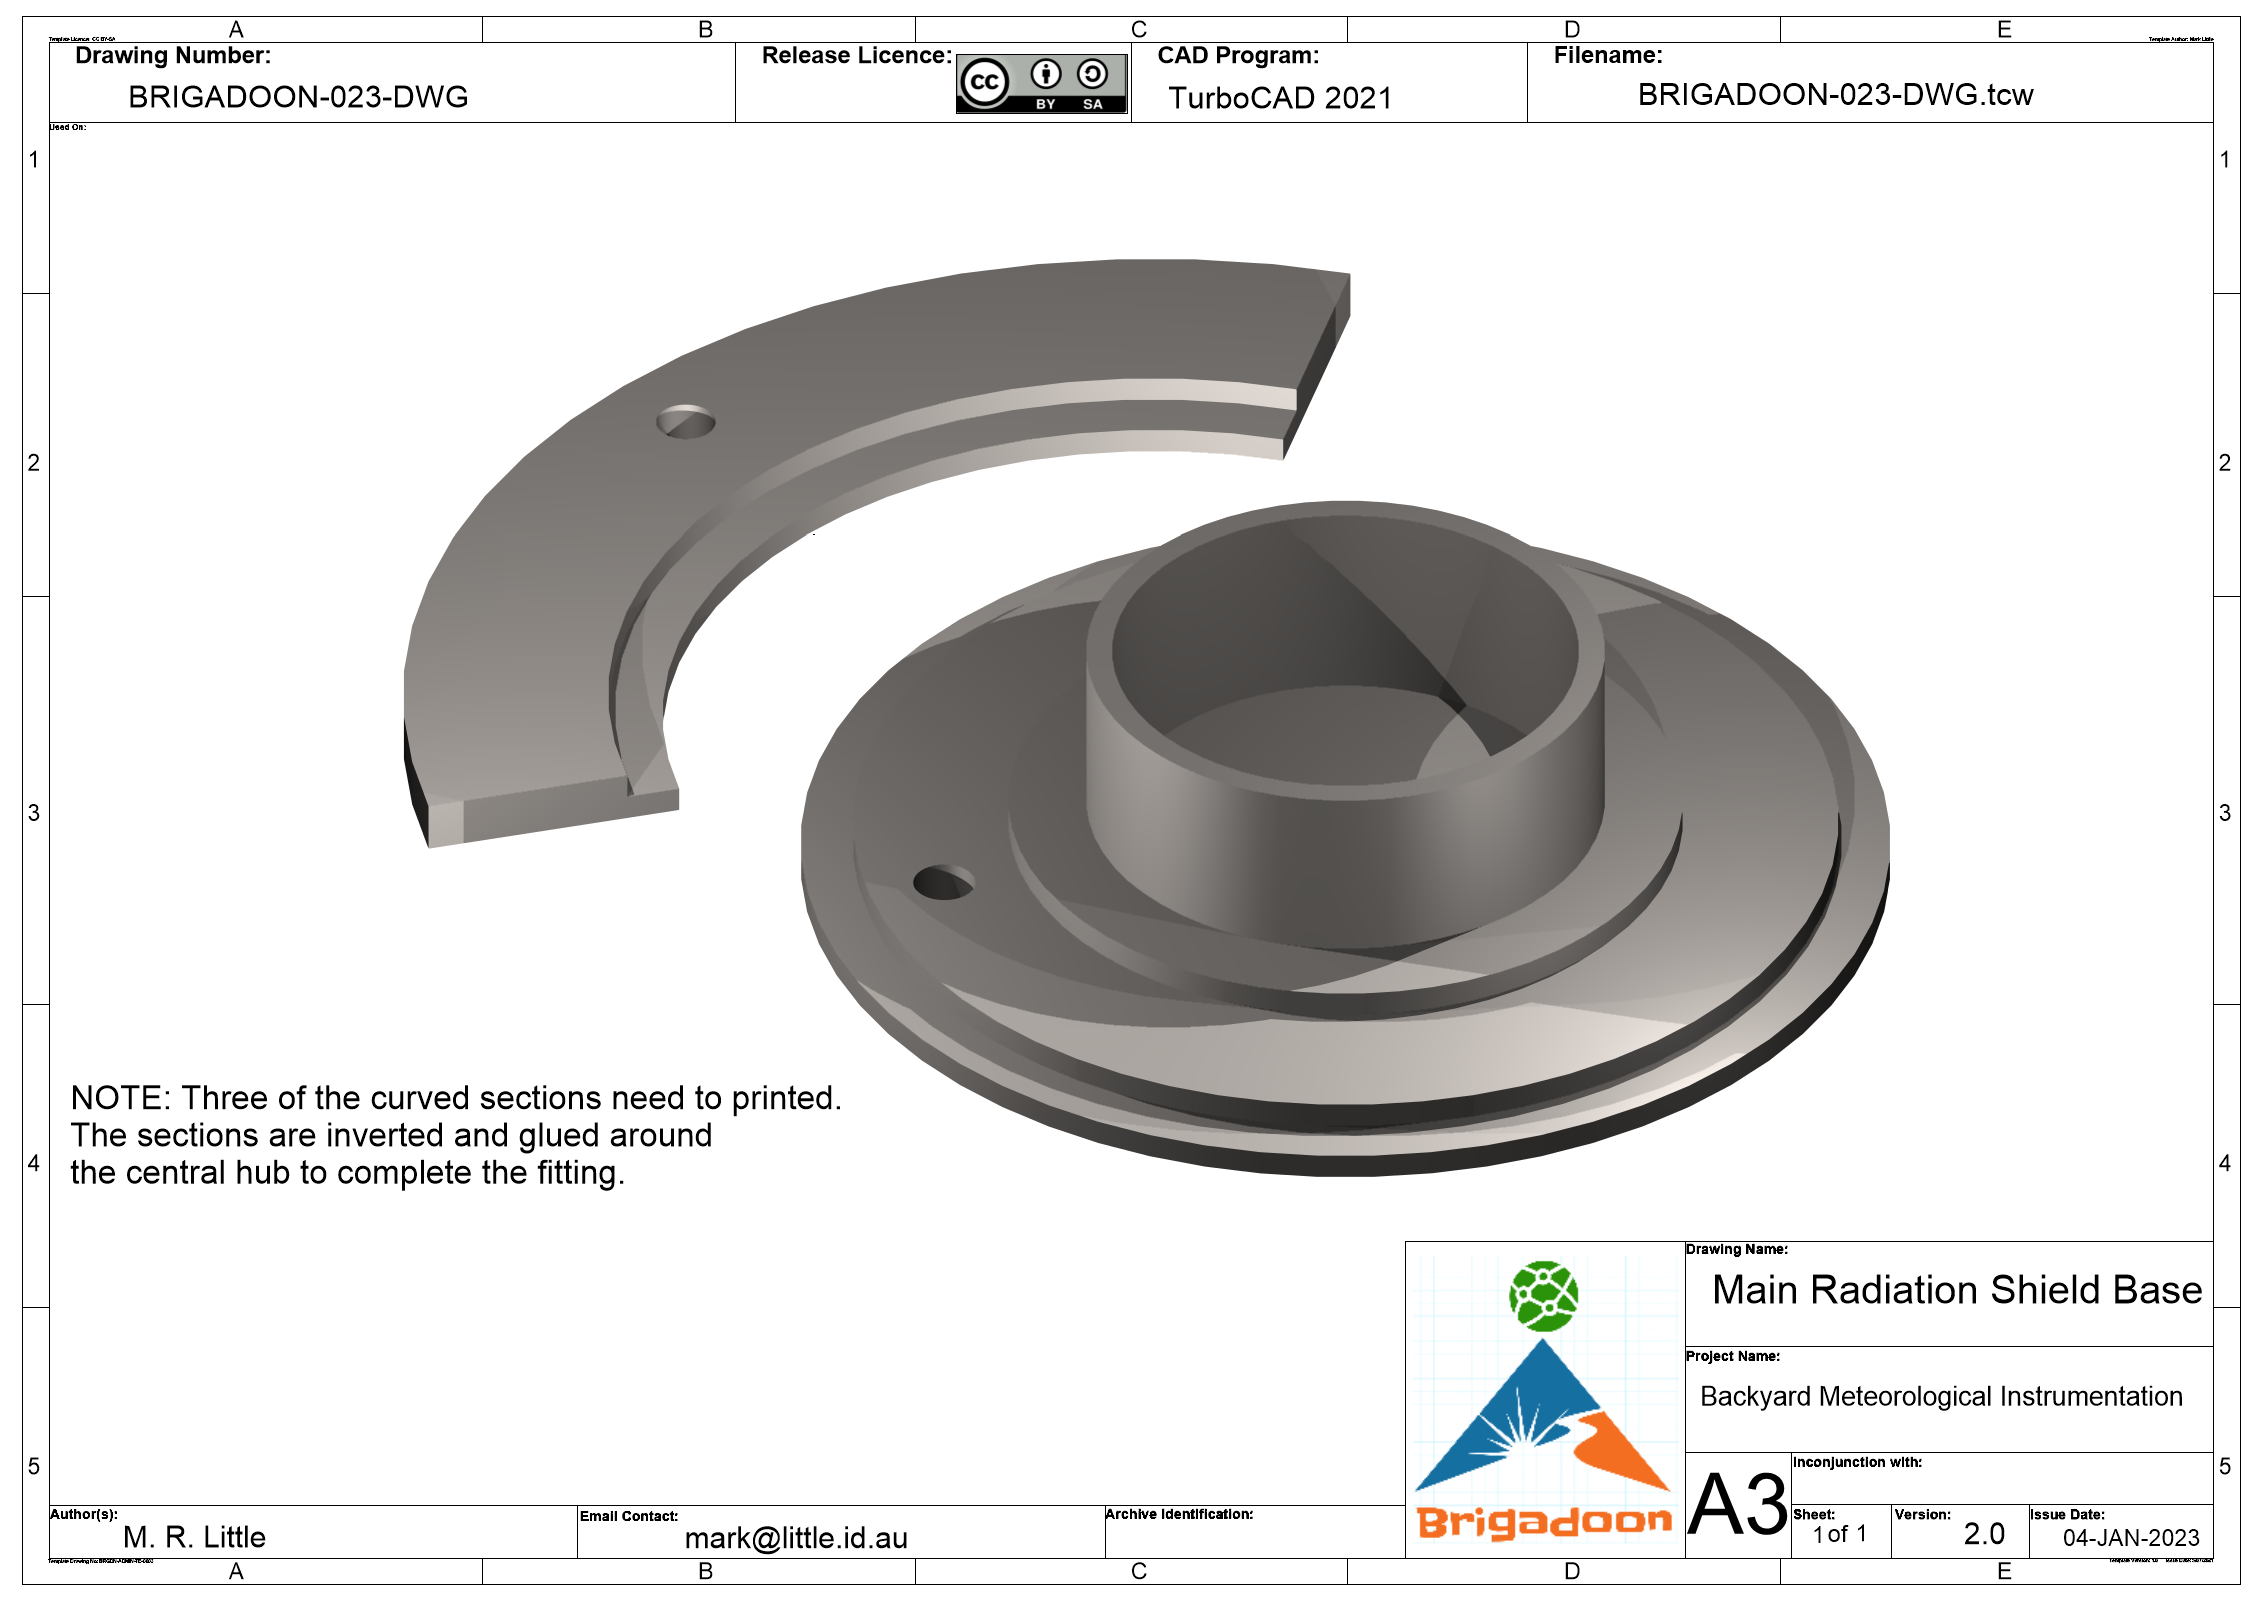
The top of the enclosure is also vented to help hot air escape from inside the enclosure, but again, it is unlikely that this will be sufficient to keep the electronics from overheating.
A small available fan that could be attached to the case was tried, but the air flow was essentially insignificant for this purpose and the fan had a draw of 150mA from the 5V supply.  One of the reasons that this fan had such poor air flow is that the area of the central hub holding the motor was much greater than the area available to the blades. The blades on a larger fan are larger proportionally since the central doesn't get larger at the same rate.

Mounting Box Insulation

Just about everyone has heard about the Esky® which is generally a metal/plastic skinned coolite (polystyrene foam) box designed to keep the contents cool. Taking a leaf out of that book, the internal faces of the mounting enclosure that are subject to direct sunlight have been lined where practical using an excess piece of coolite that has been cut to size. If additional foam comes to hand, it will be used to line the other faces of the enclosure. Although not enough data was taken over long enough to make any definite conclusions, it looks like the Raspberry Pi cooled by about 4~5°C in the afternoon summer sun
.

Cooling Fan Hat

One fan cooling option is available with the Argon Fan Hat that can be mounted directly on the Raspberry Pi. A script is available to control the fan, or it can be controlled using I2C commands as shown on this site. At A$16.45 (2023), it is an attractive option compared to just buying a fan and then having to make a mounting frame and a switch to control it.

The only issue is that it does not appear to provide a signal that can be used to turn on other cooling devices in the enclosure. As a result, it will not be the first choice solution, but it will be kept as a fallback option.

Custom Cooling Fans

Element 14 advertised an MP001243 Raspberry Pi cooling fan for about A$8 (2023), but it did not come with any mounting. An inspection of the fan showed that a 3D-printed carrier could be glued to the base of the DIN rail case for the PI and provide a direct flow onto the CPU and adjacent chips. The airflow exits the fan on the side that has the sticker on it. Although the air flow seems adequate, the other disadvantage of this fan is that with a draw of 120mA, it is too much for the Pi to control directly and a switch is required to control it.

Because all of the Raspberry Pi's I/O pins are terminated on the 40 pin terminal block, the automatic fan control pin (selected as GPIO16) is routed from there to the I/O module where an open collector driver chip is used to turn the fan off and on.

Because there are no spare terminals on the Raspberry Pi's terminal strip, three (3) extra terminal are supplied next to the Raspberry Pi to handle the fan's power leads. The power to the fan is connected to the +5V terminal on the I/O terminal block, and the earth wire is connected to the fan control pi on the I/O console's terminal strip.

By having the control lines external to the Raspberry Pi enclosure, it can also be used to control other fans - something that is more difficult with solutions such as the Argon Fan Hat. The mounting shown on the left is small enough that two fans can be fitted into the DIN Rail enclosure and this has been done.

With both fans running, the current draw will be about 240 mA (about 1.25W) so to keep average power consumption down, the fans will be individually controlled by the Raspberry Pi via the I/O Module which will also be capable of controlling a larger fan to ventilate the enclosure, and an internal LED strip light.
The image below shows that initial installation of the fan shown in the image above. There was not temperature control at this stage, so the fans ran simultaneously and constantly. The horizontal axis is the time in UTC, meaning that 12am UTC corresponds to 10:30am Local Time. The left of the graph shows the CPU temperature overnight. When the sun rises and begins to strike the (uninsulated) rear wall of the cabinet, the CPU temperature begins to rise.

At the point of the discontinuity, the system is powered down and the Raspberry Pi case is removed and the base swapped for the base holding the fans. After the fans are wired to the +5V supply, the system is restarted. The reason that the temperature has dropped so much is that the system has been powered off and the cabinet open to the cool morning air while the modifications were made.

After the enclosure stabilised, the CPU temperature had a relatively small riuse until about local noon when it began to slowly cool. The front side of the enclosure (the door side) has a thick layer of polystyrene foam on the inside wall and does get some protection from the radiant heat.

Around 5pm local time, the power was removed from the fans and the rise in CPU temperature is immediately obvious. After it peaks just over 60°C, the temperature continues the cooling trend that is expected as the sun goes towards the horizon.

Licenced under Creative Commons Attribution Share Alike 4.0 International or better by Mark Little (2022 - 2023)